
 Very excited that our collection is now available on ASOS! Check out the page here.
Thanks! xxx

To make sure that the colour and fabric type is just right for the bridesmaid dress that I’m currently making, these fabric samples were collected and presented to the client. The samples were then discussed with the bride-to-be and it was decided that no. 2 on the fabric list (a rich purple coloured crepe) is most suited to the occasion. It’s a great idea to check each design stage with the client to make sure that the finished product is exactly what they want. More dress updates to follow!
A designers’ collection of inspirational images, photographs and ‘quick idea’ sketches needs a home. Usually this would involve using a sketchbook or scrapbook but I found that once I stuck images down on to a page, I almost immediately wanted to move them around. I needed a more flexible sketchbook solution! That’s when I started to catalogue images into an A4 ringbinder. This means nothing is permanent and you can switch, add or subtract pages easily depending on what your work focus is at the time. It’s worked really well for me and has meant that there is no longer a precarious pile of papers on my desk! You can also use a snazzy A3 folder which looks very professional (especially in a landscape orientation!). How do you store your inspiration? And am I on my own in sometimes preferring things a little more tactile than Polyvore or Pinterest?!

I bought this book from the Brick Lane Tatty Devine store a few weekends ago on a trip to London. It’s packed full of cool ideas for DIY jewellery projects, including one of my favourites, the bow tie necklace (pictured below). The book is punctuated with Tatty Devine’s personalised hints and tips to help with the practical side of things. The book is really nicely presented and easy to follow with a clear breakdown of all the tools you may need at the start. Unusually – there is also a list of recommended suppliers at the back of the book. This surprised me as good suppliers are usually hard to find and companies often keep their cards close to their chests where business is concerned! Some of the projects shown are not my cup of tea but I definitely learned a lot from this book. An inspirational 8/10!


So, you may have seen a few new jewellery shots popping up on the Beautiful Plumage blog recently. This shoot was the first for our new brand Cutworks. It has meant that I needed to learn how to Photograph small things. Fast. Here are my top tips for successful accessory photography…
The Rules…
No. 1: Good Lighting
Natural, outdoor light is the cameras best friend but a studio setting (complete with studio lighting) also works. Equipment including spotlights and light reflectors can help to deliver a whole spectrum of lighting shades. I like playing with a 2 sided reflector which has 1 gold and 1 silver surface, meaning you can quickly flip it to reflect either warm or cool light on to your subject/object. The reflector light is soft and subtle but definitely effective.
No. 2: Background is Key
An objet d’art (or Design for that matter) usually looks best with a plain, white background. Check out this photograph of the pair of iconic Louboutin shoes below. This style of image keeps the focus solely – pun totally intended – on the object and is favoured for editorial features and promotional shots.

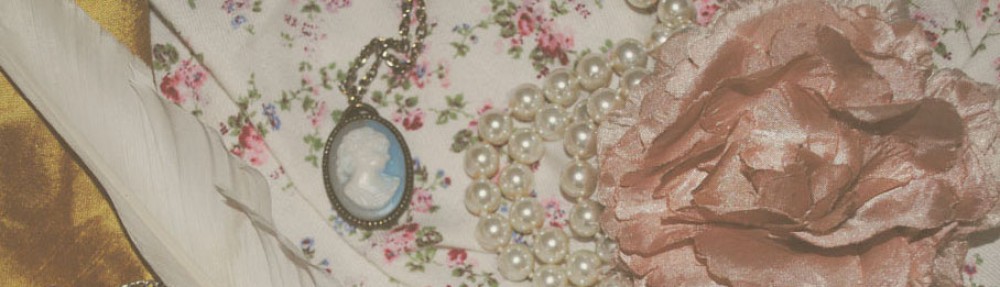
An exception to this however may be when you want to imply a certain mood/theme/culture link for a shoot or object using the background as a tool in itself. Jewellery often looks good with a contextual background e.g. jewellery box setting, fabric or a (relevant!) body part. Thoughtfully placed background objects can be helpful in illustrating product size to the customer and can also resonate or amplify your brands ethos. As an example: you could set the scene for a streetwear fashion jewellery shoot by finding a cool graffed background to add that urban style to your shot.

Above: practicing with composition and luxurious gold fabric background.
No. 3: Learn to use Photoshop!
(Or other photo-editing software.) It is so disheartening to spend hours mastering your angles, lighting and composition, and creating the perfect photograph… only to find a tiny spec of dust or a light reflection spot which spoils all of your hard work in the space of a pixel or two. Using a tool such as the clone stamp or healing brush allows you to rectify these imperfectons in seconds – although it is worth saying – don’t expect miricles, a bad blurry photograph is still a bad blurry photograph, no matter how many filters you put on it!
I hope this has been helpful – happy snapping!
+++++++++++++++++++++++++++++++++++++++++++++++++

A Birthday Rose to us from, er….us!
Beautiful Plumage is a whole year old! It’s been really great to find a way to document our creatively chaotic world and to make sense and order of the various projects we undertake. Thanks to all of our fantastic followers (and commenters!). Due to popular demand, this year will bring lots more ‘How To’ posts; as well as the usual sewing and garment manufacture tutorials, other areas of interest will be covered such as Photography, Social Media, Business and anything else which we learn along the way and think may be useful to share with you.
Here’s to another year of blogging and to meeting/hearing from more fashion conscious, crafty, vintage loving, creative people!
xxx

