Design and Make Project: Summer Travel Bag

IMG_0905 IMG_0941

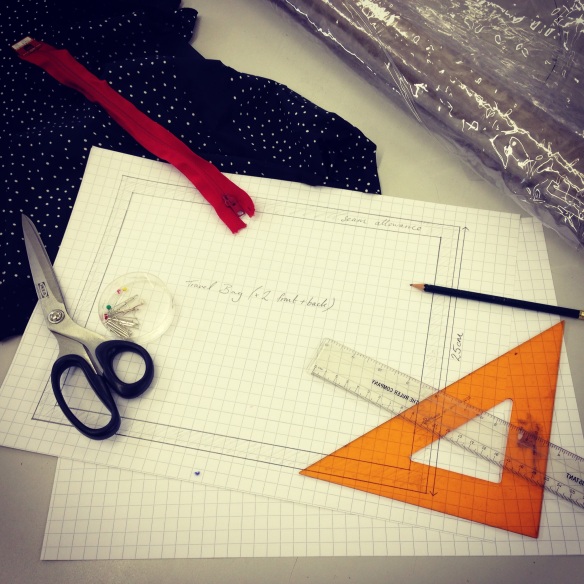
  In summer, weekends seem to book up pretty fast.  Before you know it, your diary is full of weddings, holidays and festivals.  Hoorah!  The downside?  The feeling that you are living out of a suitcase! I thought that this translucent travel bag would be an ideal sewing project for right now (and incredibly practical, did I mention?).  I used PVC, grey polyester thread and a jacket zip which fully opens to allow easy access to your favourite health and beauty products.

Here’s how I did it:

  • Draw out 1 x rectangular front, 1 x triangular side and 1x rectangular base pattern pieces onto graph paper (this makes it easier to achieve an accurate product).  Remember to add your 1.5cm seam allowance.  Cut out.
  • ‘Pin’ or rather, stick, the pattern pieces down on to the plastic using tape (pins pierce the plastic so masking tape works much better).  Cut out.  Cut 2 x front (= front and back pieces) and 2 x side pieces.
  • Tape then sew bottom of front and back pieces to longer side of base using a standard straight stitch (e.g. On a Bernina machine the length is on the 2.5 setting for a normal straight stitch.  Consult your manual for other stitch variations).
  • Tape then sew bottom of sides to base
  • Tape then sew sides to front and back pieces
  • Masking tape zip in place and use a tacking stitch to secure.  Sew over using zipper foot.  This bit is tricky as the zip slides around the plastic so take care here.  The zip only needs to be attached at the longer sides – leaving it free to open more easily.
  • Trim edges neatly with scissors and turn inside out so that seams are on the inside.

Voila!  You could also experiment with different sizes and colours.  I have some neon pink plastic which would make a pretty cool version which you wouldn’t lose easily!  Happy Sewing 🙂

Alternative Sketchbook…


100_1182

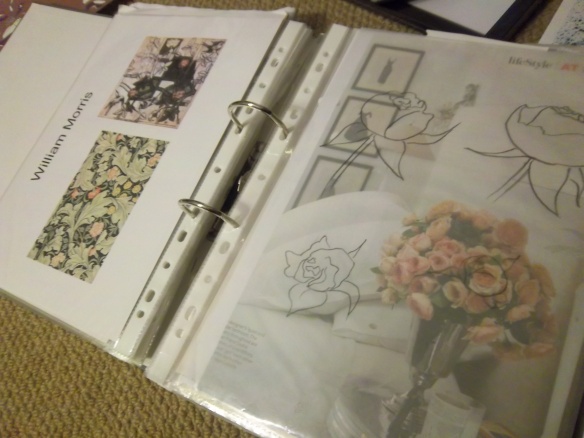
A designers’ collection of inspirational images, photographs and ‘quick idea’ sketches needs a home.  Usually this would involve using a sketchbook or scrapbook but I found that once I stuck images down on to a page, I almost immediately wanted to move them around.  I needed a more flexible sketchbook solution!  That’s when I started to catalogue images into an A4 ringbinder.  This means nothing is permanent and you can switch, add or subtract pages easily depending on what your work focus is at the time.  It’s worked really well for me and has meant that there is no longer a precarious pile of papers on my desk!  You can also use a snazzy A3 folder which looks very professional (especially in a landscape orientation!).  How do you store your inspiration?  And am I on my own in sometimes preferring things a little more tactile than Polyvore or Pinterest?!

She Got Skills! How to Photograph Fashion Accessories – a Basic Guide

cutworks jewellery 740658_579505582075333_2062957304_o

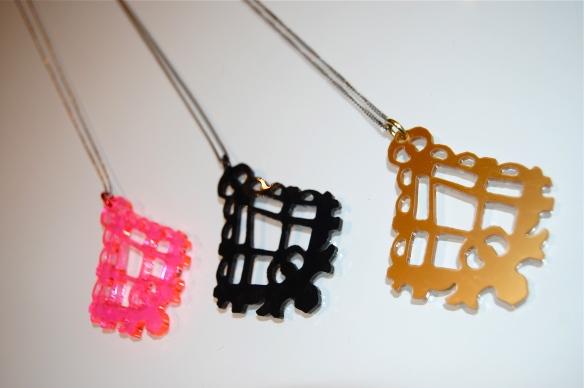
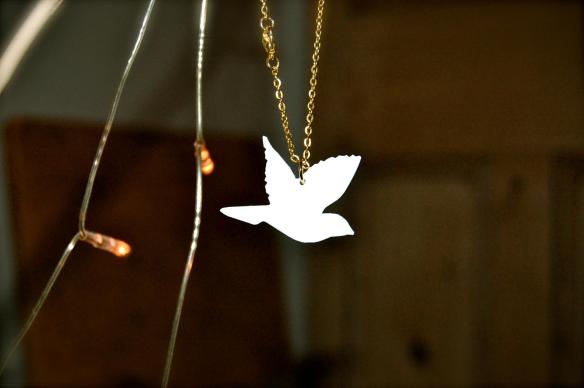
So, you may have seen a few new jewellery shots popping up on the Beautiful Plumage blog recently.  This shoot was the first for our new brand Cutworks.  It has meant that I needed to learn how to Photograph small things.  Fast.  Here are my top tips for successful accessory photography…

The Rules…

No. 1: Good Lighting

Natural, outdoor light is the cameras best friend but a studio setting (complete with studio lighting) also works.  Equipment including spotlights and light reflectors can help to deliver a whole spectrum of lighting shades.  I like playing with a 2 sided reflector which has 1 gold and 1 silver surface, meaning you can quickly flip it to reflect either warm or cool light on to your subject/object.  The reflector light is soft and subtle but definitely effective.

No. 2: Background is Key

An objet d’art (or Design for that matter) usually looks best with a plain, white background.  Check out this photograph of the pair of iconic Louboutin shoes below.  This style of image keeps the focus solely – pun totally intended – on the object and is favoured for editorial features and promotional shots.

christian-louboutin-shoes

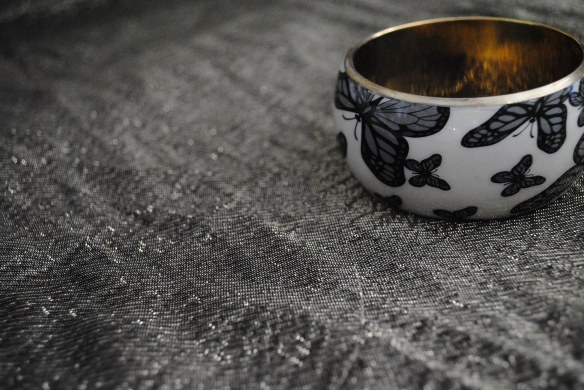
An exception to this however may be when you want to imply a certain mood/theme/culture link for a shoot or object using the background as a tool in itself.  Jewellery often looks good with a contextual background e.g. jewellery box setting, fabric or a (relevant!) body part.  Thoughtfully placed background objects can be helpful in illustrating product size to the customer and can also resonate or amplify your brands ethos.  As an example: you could set the scene for a streetwear fashion jewellery shoot by finding a cool graffed background to add that urban style to your shot.

bangle

Above: practicing with composition and luxurious gold fabric background.

No. 3: Learn to use Photoshop!

(Or other photo-editing software.)  It is so disheartening to spend hours mastering your angles, lighting and composition, and creating the perfect photograph… only to find a tiny spec of dust or a light reflection spot which spoils all of your hard work in the space of a pixel or two.  Using a tool such as the clone stamp or healing brush allows you to rectify these imperfectons in seconds – although it is worth saying – don’t expect miricles, a bad blurry photograph is still a bad blurry photograph, no matter how many filters you put on it!

I hope this has been helpful – happy snapping!

+++++++++++++++++++++++++++++++++++++++++++++++++

A Beautiful Birthday…

A Birthday Rose to us from, er….us!

Beautiful Plumage is a whole year old! It’s been really great to find a way to document our creatively chaotic world and to make sense and order of the various projects we undertake.  Thanks to all of our fantastic followers (and commenters!).  Due to popular demand, this year will bring lots more ‘How To’ posts; as well as the usual sewing and garment manufacture tutorials, other areas of interest will be covered such as Photography, Social Media, Business and anything else which we learn along the way and think may be useful to share with you.

Here’s to another year of blogging and to meeting/hearing from more fashion conscious, crafty, vintage loving, creative people!

xxx

How to…Invisible stitch

This stitch is generally used in the finishing stages of a bag/garment/crafty product.  Usually, a sewing machine helps to complete the majority of work.  Sometimes however, there can be a gap (e.g. where you’ve turned something through), a lining piece or a hem which would be finished in a neater fashion by using hand stitching.  Follow the stitching steps 1 – 5 as shown in the diagram below.  When pulled together, this will close the gap without showing the thread.  Sew to the end, then knot.


Beautiful Plumage Top Tip: Always use the closest match of thread to fabric colour to achieve a professional finish.

Note: the edges of the fabric are folded inside – the aim is to sew a neat line where the seam would have been if you had carried on sewing using the machine.

Hope this was helpful – please let me know if you would like any other demos/photographs of this process or any other by commenting below.


Upcycled Parka

This week my shabby old coat has been rejuvenated!  The A/W 2009 Primark number was ripped at the arm, the fur trim was falling off and the colour had faded to an unsightly grey.

Restorative Process:

  • Colour refreshed with a Dylon ‘Machine Wash’ dye (this only works for certain fabrics e.g. natural fabrics like cotton dye very well)
  • Hood lining replaced with leopard print cotton fabric
  • Fur trim hand sewn on to edge of hood
  • Tear at sleeve seam repaired using slip stitch

A new coat for under a fiver.  Super Chuffed!  Has anyone else got an upcycled/recycled garment they are really pleased with?  I’d love to hear about them.

Mock Overlock or Stretch Stitch – Repairing Elastane Garments

Some sewing machines have a mock overlock or stretch stitch setting.  This is a wide stitch which is a criss cross, mixed with a staight stitch in between.  It can be used to finish edges of seams (depending on the type/weight of fabric) as it has a similar appearance to using an overlocking machine.  It is also called stretch stitch as when you are working with stretch fabrics, the stitch can be used to sew seams and hems in place, whilst still allowing the stretch of the fabric/garment.

Below I have shown you how I repaired my bikini using this stitch.  I swim a lot and the original thread has fallen apart where my locker key gets pinned!  I’m really pleased with the result and I hope you find this useful.  If you would like advice on any other repairs, feel free to send me a photo or drop me an email and I’ll get back to you asap.

Note: Always test the stitch on a section of your fabric before you use it as a mock overlock/way of finishing your hems or seams.  The success varies greatly from fabric to fabric.

Fabric Covered Flower Pots

If you need further excuse to be outside in this gorgeous weather try this crafty little project of covering flower pots with recycled fabric – really adds a nice bit of colour/texture/pattern to your garden.  Just cut fabric to correct size and glue on with spraymount or craft glue.  Stretch fabrics e.g. jersey are easiest to adjust.  Simple!

Adding Shape with Shirring Elastic

It’s a rainy Saturday afternoon and I’m sat at my sewing desk with one of my favourite takeaway treats (a steaming hot cappuccino from the local coffee shop – lovely!).  After mending a couple of garments (more on that later) I decide to finish my tutorial on sewing with shirring elastic as mentioned in the post Vintage Fabric Ruched T-shirt dress.  Sewing with shirring elastic is a great way to add shape by nipping in a waist or decorating a cuff.  I hope you enjoy the new ‘How To’ format.  Again, if there are any sewing tutorials you would find helpful, don’t be shy(!), get in touch by commenting below…

Top Tip: It’s best to wind the shirring elastic onto the bobbin by hand as this stops the machine stretching it out too much.

Quick and easy skirt shortening method

Over 900000 tons of shoes and clothes are thrown away in the UK each year.  I like to minimise my ‘landfill footprint’ as much as is fashionably possible by wearing vintage, taking old clothes and accessories to charity shops, attending/organising clothes swap parties and customising/refashioning items.  Transforming a garment which is considered un-wearabe or outdated into something fresh and fashionable is a great feeling.  Over time I will be sharing ways of upcycling various vintage items.  Tutorials will also be added to show how you can modernise old pieces from your wardrobe.  Here is a quick and easy way to shorten a cotton (or similar fabric) skirt or dress.  If there are any other fashion/textile processes that you would like to know more about, please comment below and I’ll create a How To just for you lucky reader!  Happy Sewing!