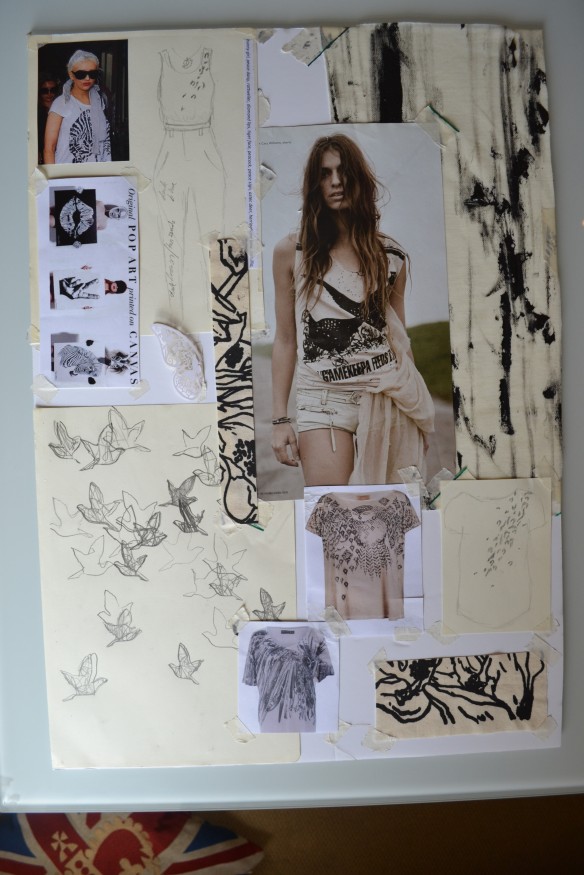
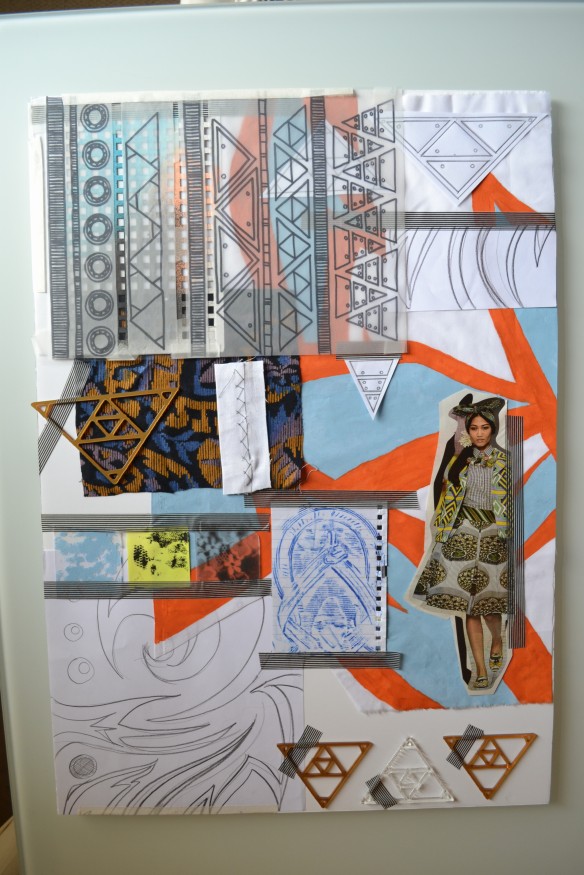
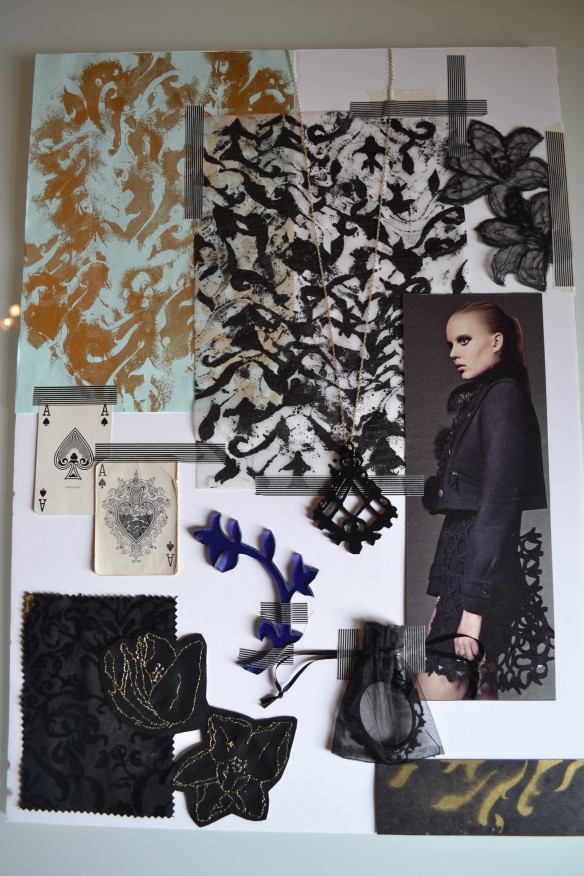
Mood/Theme boards, Quick Pics.

DSC_0825DSC_0823DSC_0864

Found some Mood/Theme boards from previous projects today. I love layering sketches, drawings, fabric samples, prints and mixing textures together to create these inspirational starting points. Laser cutting acrylic was also pretty fun – the triangles and floral shapes were designed and cut out on gold, black and purple plastics.

Design and Make Project: Summer Travel Bag

IMG_0905 IMG_0941

  In summer, weekends seem to book up pretty fast.  Before you know it, your diary is full of weddings, holidays and festivals.  Hoorah!  The downside?  The feeling that you are living out of a suitcase! I thought that this translucent travel bag would be an ideal sewing project for right now (and incredibly practical, did I mention?).  I used PVC, grey polyester thread and a jacket zip which fully opens to allow easy access to your favourite health and beauty products.

Here’s how I did it:

  • Draw out 1 x rectangular front, 1 x triangular side and 1x rectangular base pattern pieces onto graph paper (this makes it easier to achieve an accurate product).  Remember to add your 1.5cm seam allowance.  Cut out.
  • ‘Pin’ or rather, stick, the pattern pieces down on to the plastic using tape (pins pierce the plastic so masking tape works much better).  Cut out.  Cut 2 x front (= front and back pieces) and 2 x side pieces.
  • Tape then sew bottom of front and back pieces to longer side of base using a standard straight stitch (e.g. On a Bernina machine the length is on the 2.5 setting for a normal straight stitch.  Consult your manual for other stitch variations).
  • Tape then sew bottom of sides to base
  • Tape then sew sides to front and back pieces
  • Masking tape zip in place and use a tacking stitch to secure.  Sew over using zipper foot.  This bit is tricky as the zip slides around the plastic so take care here.  The zip only needs to be attached at the longer sides – leaving it free to open more easily.
  • Trim edges neatly with scissors and turn inside out so that seams are on the inside.

Voila!  You could also experiment with different sizes and colours.  I have some neon pink plastic which would make a pretty cool version which you wouldn’t lose easily!  Happy Sewing 🙂

Modern Living: How to Make this Sumptuous Charcoal Rag Rug…

DSC_2446

100_1183

100_1186

You will need…

  • A big pile of scrap fabric – fleece is ideal but cotton works too
  • A plastic or fabric mesh (to use as a sort of weaving frame)
  • A latch hook if you are working on a small scale
  • Some durable, thick fabric for the base
  • Scissors
  • Needle and thread

The materials I used for this were 90% recycled:  fabric cut offs and a square piece of unwanted plastic mesh.  Luckily the fabric scraps were a gorgeous charcoal grey colour which matches my living room perfectly!  The mesh had holes of about 2cm x 2cm, you can find similar online.

  1. Cut the fabric pieces into strips of around 4cm x 20cm.  I varied the size of these strips as I like things to look a little ‘Tim Burtonesque’ and not too uniformed!
  2. Thread one piece of fabric through the mesh and tie 2 knots at the top to secure.  This is where you would use the hook if it is too fiddly for hands to thread through.
  3. Repeat until you have covered all of the mesh and are the proud creator of a full, fluffy rug.  Note – inviting a friend round to watch a film works well for this project as you can ask them to help you tie on the pieces whilst viewing; it’s very therapeutic you know…
  4. Optional – depending on the appearance of the underneath of your rug and the materials you used, (and, let’s face it, how much you care about what you can’t see!) you may want to cover the messy bit underneath.  I did this by cutting out a large square of fabric, folding under the edges, pinning, and invisible stitching the square to the fabric pieces of the rug.  I made a paper template for this first as it needs to be accurate and have enough room to turn the edges under (about 3cm for thick fabric).

Hope you enjoy this project – if you have any technical questions feel free to comment below and I’ll get back to you asap xxx

Book Review – Tatty Devine, How to Make Jewellery

photo t d

I bought this book from the Brick Lane Tatty Devine store a few weekends ago on a trip to London.  It’s packed full of cool ideas for DIY jewellery projects, including one of my favourites, the bow tie necklace (pictured below).  The book is punctuated with Tatty Devine’s personalised hints and tips to help with the practical side of things.  The book is really nicely presented and easy to follow with a clear breakdown of all the tools you may need at the start.   Unusually – there is also a list of recommended suppliers at the back of the book.  This surprised me as good suppliers are usually hard to find and companies often keep their cards close to their chests where business is concerned!  Some of the projects shown are not my cup of tea but I definitely learned a lot from this book.  An inspirational 8/10!

photo

Book Review.docxtd

A Beautiful Birthday…

A Birthday Rose to us from, er….us!

Beautiful Plumage is a whole year old! It’s been really great to find a way to document our creatively chaotic world and to make sense and order of the various projects we undertake.  Thanks to all of our fantastic followers (and commenters!).  Due to popular demand, this year will bring lots more ‘How To’ posts; as well as the usual sewing and garment manufacture tutorials, other areas of interest will be covered such as Photography, Social Media, Business and anything else which we learn along the way and think may be useful to share with you.

Here’s to another year of blogging and to meeting/hearing from more fashion conscious, crafty, vintage loving, creative people!

xxx

How to…Invisible stitch

This stitch is generally used in the finishing stages of a bag/garment/crafty product.  Usually, a sewing machine helps to complete the majority of work.  Sometimes however, there can be a gap (e.g. where you’ve turned something through), a lining piece or a hem which would be finished in a neater fashion by using hand stitching.  Follow the stitching steps 1 – 5 as shown in the diagram below.  When pulled together, this will close the gap without showing the thread.  Sew to the end, then knot.


Beautiful Plumage Top Tip: Always use the closest match of thread to fabric colour to achieve a professional finish.

Note: the edges of the fabric are folded inside – the aim is to sew a neat line where the seam would have been if you had carried on sewing using the machine.

Hope this was helpful – please let me know if you would like any other demos/photographs of this process or any other by commenting below.
 

Bristol Fashion Week A/W 2012

Been super busy over the last few weeks with dress commissions and sewing projects….However, I did find the time to zoom to Cribbs Causeway a couple of weeks ago (after a hard days work sewing) to catch the last few scenes of the BFW catwalk show.

It’s always great to attend these events as not only am I a goody bag and a few beauty samples richer – I also feel inspired to create some other key pieces for my fast growing Autumn/Winter 2012 wardrobe.  I have some medium-weight tweed fabric which I’ve been holding on to, knowing that the right trend was just around the corner.  John Lewis, M&S and River Island have confirmed my suspicions by showing some gorgeous heritage-style blazers, jackets and coats.  I have an idea for a beautifully tailored, mid-length tweed jacket in mind.  Might be popping in to Cribbs to pick up a few accompanying heritage-style accessories though…

Dress Commission

Really excited about the latest dress commission; A very swanky full-length black number with wrap top and fishtailed skirt. This bespoke creation is to be worn for a James Bond themed evening and will be made to measure so that it fits my client perfectly. I love creating special occasion attire that feels amazing to wear.  The deadline for this dress is next Wednesday and with a fitting booked in for next Monday, I better grab my tailors chalk and get started!

Updates on this project to follow…

If you would like to use this bespoke design/alteration service, please email beautifulplumage@hotmail.co.uk or use the contact form below.

Upcycled Parka

This week my shabby old coat has been rejuvenated!  The A/W 2009 Primark number was ripped at the arm, the fur trim was falling off and the colour had faded to an unsightly grey.

Restorative Process:

  • Colour refreshed with a Dylon ‘Machine Wash’ dye (this only works for certain fabrics e.g. natural fabrics like cotton dye very well)
  • Hood lining replaced with leopard print cotton fabric
  • Fur trim hand sewn on to edge of hood
  • Tear at sleeve seam repaired using slip stitch

A new coat for under a fiver.  Super Chuffed!  Has anyone else got an upcycled/recycled garment they are really pleased with?  I’d love to hear about them.